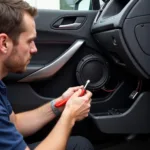
Torn car speakers can be a real nuisance, distorting your favorite tunes and diminishing your driving experience. Fortunately, fixing a torn speaker cone is often possible without replacing the entire unit. This guide will walk you through the steps to repair a torn car speaker, restoring clear audio to your vehicle. Let’s dive in and bring those speakers back to life.
Repairing a torn speaker requires a little patience and the right approach. Depending on the severity of the tear, you may be able to achieve a near-perfect repair. For more complex audio issues, like bass disturbance, you might want to check out our guide on how to repair car speaker bass disturbance.
Identifying the Damage and Gathering Supplies
Before you begin the repair process, it’s essential to assess the damage. Carefully examine the speaker cone for tears, punctures, or other deformities. Note the size and location of the tear, as this will inform your repair strategy. Gather the necessary supplies, including a speaker repair kit (commonly available online or at electronics stores), a clean cloth, rubbing alcohol, a small brush, and a utility knife or sharp scissors.
Cleaning the Damaged Area
Cleanliness is crucial for a successful repair. Using a clean cloth dampened with rubbing alcohol, gently clean the area around the tear. This removes dust, dirt, and grease, ensuring the adhesive in the repair kit adheres properly. Allow the area to dry completely before proceeding.
Applying the Speaker Repair Adhesive
Most speaker repair kits come with specialized adhesive designed for this purpose. Follow the manufacturer’s instructions carefully. Typically, you’ll apply a small amount of adhesive to the torn edges and gently bring them together. Hold the edges in place for the recommended time to allow the adhesive to bond.
Reinforcing the Repair (For Larger Tears)
For larger tears, you may need to reinforce the repair to prevent it from reopening. Some repair kits include patches or backing material that can be applied over the repaired area. If your kit doesn’t include these, you can use a piece of thin, flexible fabric cut slightly larger than the tear. Apply a thin layer of adhesive to the back of the patch and carefully place it over the repaired area. Smooth out any wrinkles or bubbles.
Testing the Repaired Speaker
Once the adhesive has fully cured (refer to the manufacturer’s instructions for drying time), carefully test the repaired speaker. Start with low volume and gradually increase it, listening for any distortion or rattling. If the sound is clear, your repair was successful! If you’re experiencing issues with specific brands like JBL, our guide on can jbl car speakers repairable can offer additional insights.
How to Prevent Future Tears
Preventing future tears is often easier than repairing them. Avoid poking or pressing on the speaker cone. Be mindful of objects that could damage the speakers, especially when loading or unloading items from your car. Regular cleaning can also prevent dust and debris buildup, which can contribute to wear and tear.
Conclusion
Repairing a torn car speaker can save you time and money. By following these steps and using the right materials, you can often restore your car’s audio system to its former glory. Remember to exercise patience and precision throughout the process. Now, crank up the volume and enjoy your revitalized car audio! Don’t forget to explore other related articles for more tips on maintaining your car’s sound system.
FAQ
-
What type of adhesive should I use for car speaker repair? Specialized speaker repair adhesive is recommended, as it’s formulated for flexibility and durability.
-
Can I repair a speaker with a large tear? Larger tears can be more challenging, but are often repairable with reinforcement patches.
-
How long does the adhesive take to dry? Refer to the manufacturer’s instructions for specific drying times.
-
What if the speaker still sounds distorted after the repair? There may be other underlying issues with the speaker or audio system.
-
Where can I find a car speaker repair kit? Repair kits are readily available online and at most electronics stores.
-
Can I use super glue to repair a torn car speaker? Super glue is not recommended as it is too rigid and can crack over time with the speaker cone’s movement.
-
Is it always necessary to replace a torn car speaker? Not always. Repairing a torn speaker is often a viable and cost-effective solution, especially for small to medium tears.
Need further assistance? Contact us via WhatsApp: +1(641)206-8880, or Email: [email protected]. Our 24/7 customer support team is ready to help!

